Hello Learners…
Welcome to the blog…
Topic: Create And Connect AWS EC2 Instances In AWS Student Account
Table Of Contents
- Introduction
- Create And Connect AWS EC2 Instances In AWS Student Account
- Create AWS EC2 Instances In AWS Student Account
- Connect AWS EC2 Instances In AWS Student Account
- Summary
- References
Introduction
In this post, we discuss how we can run AWS EC2 Instances In AWS Student Account. Or we can say How to launch AWS EC2 instances. As a student when we are working with AWS we have to know how we can run EC2 instances and how we use it for our use cases.
Create And Connect AWS EC2 Instances In AWS Student Account
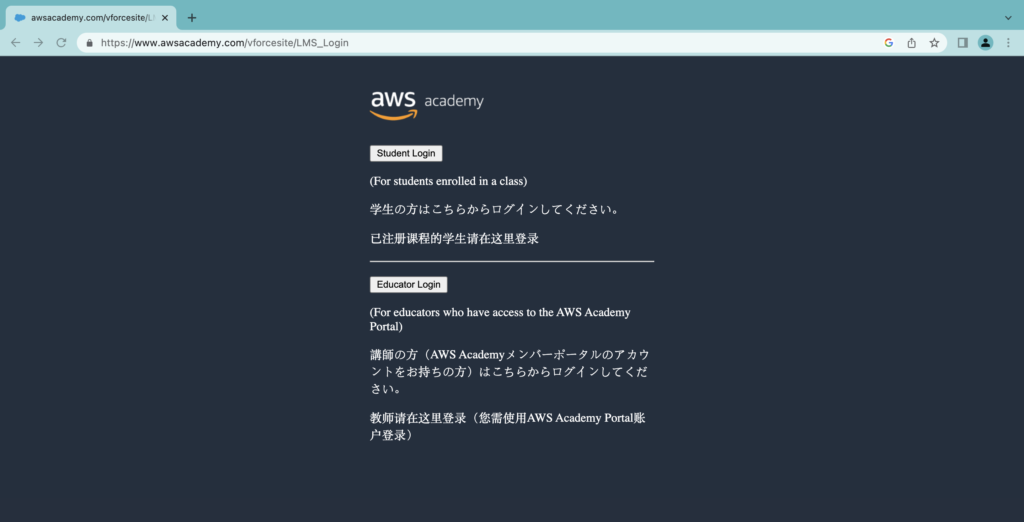
First, we have to need login credentials for student login in the AWS account. It is generally provided by educational universities they have to register for as educate on AWS.
After that go to the below URL:
And Enter your credentials in Student Login.
After successfully logging in we can see the dashboard as below.

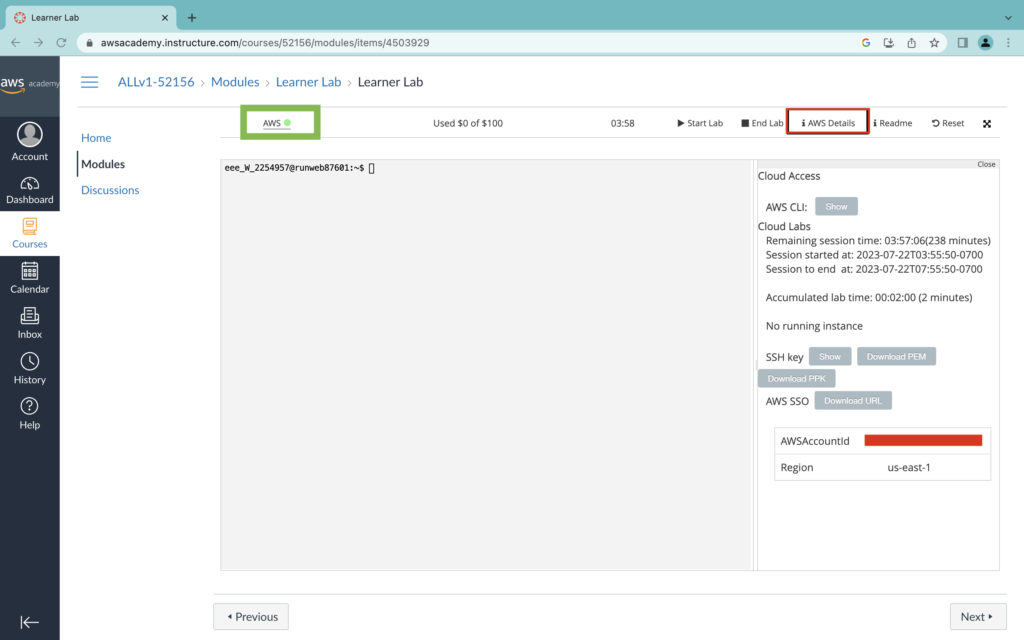
Here we get an AWS Academy Learner Lab, now click on this, and go to the Modules section in which we can see a Learner Lab.

We get a simple Learner Lab dashboard as below.

Now we have to start the lab first.

When the lab started successfully, we get some information as we can see in the above image.
The lab runs for 4 (Four) Hours, and we have a $100 credit limit that cannot be exceeded. After 4 Hours, the lab automatically stops.
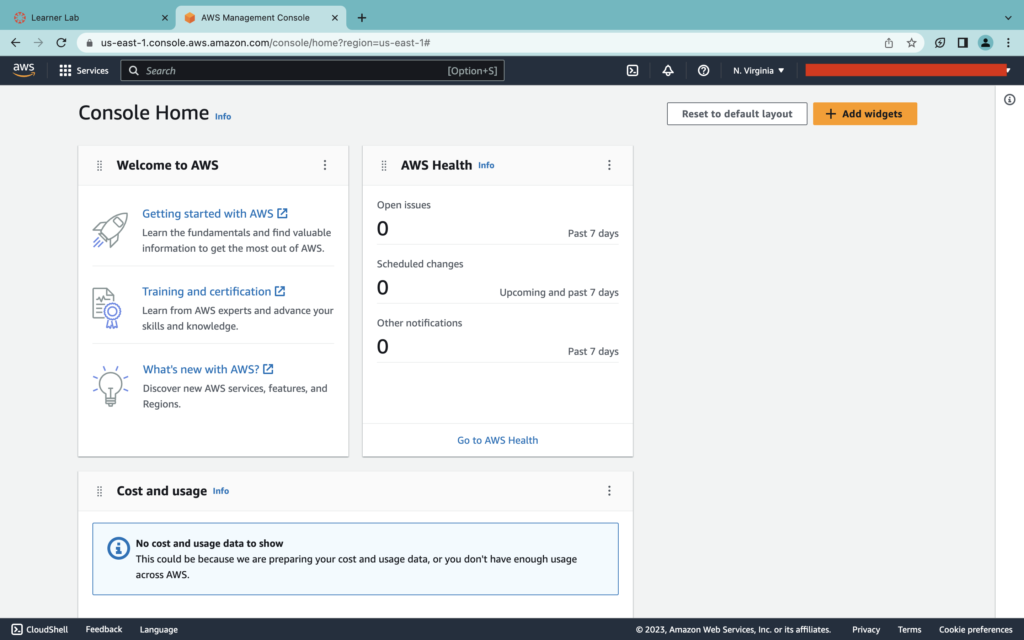
Now we go to the AWS console, go for there click on AWS (green box).
The user will be redirected to a new tab, and the AWS console will be visible as shown below.
now go to the search bar and search for ec2. and Select EC2 Virtual servers in the cloud.

And we can see the AWS EC2 dashboard as shown below.

We select instances from the left sidebar and we get the below dashboard where we can see our all instances, currently, there are no instances running or created.

Launch AWS EC2 Instances In AWS Student Account
Now we are ready to launch our EC2 instances, To launch EC2 instance click on the Launch Instance button (green box)

Add a name for our EC2 instance here we are using test_demo, but you can use anything you like.

Now scroll down and wait at the Key pair section. It is a very important part to connect EC2 instances we required a Key which we have to create from here. You can use existing ones if you have already created and downloaded them in your local system.
Here, we are creating a new key pair.

Here we give test_demo as a key name. And Click on the Create key pair button, And It will automatically download the key pair in our local system. Keep the key in a safe place.

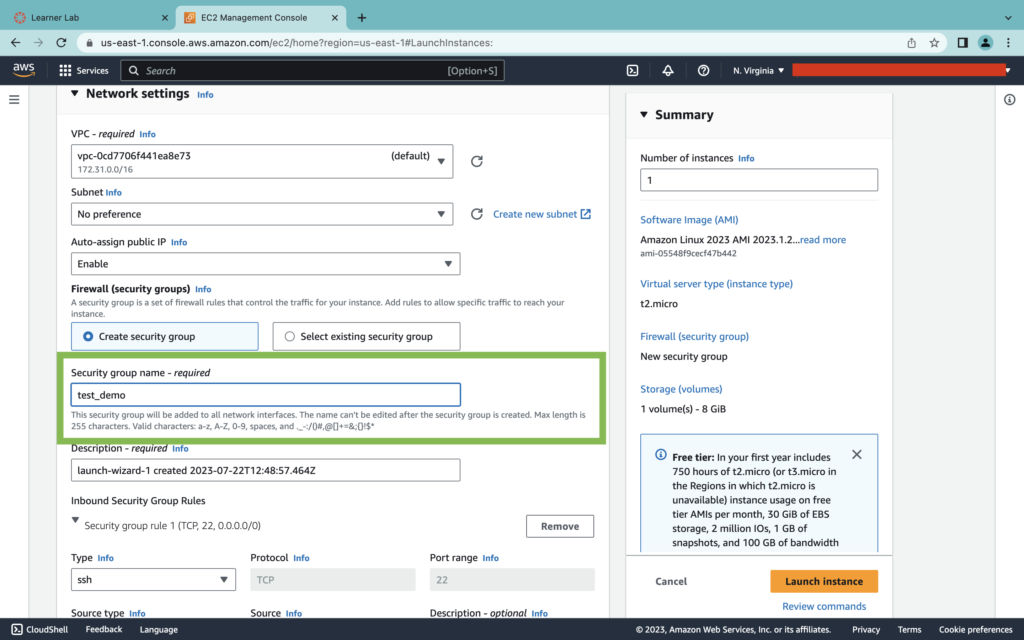
Again scroll down and Edit the Network settings.

Here we are creating a security group for our EC2 instances, named test_demo.
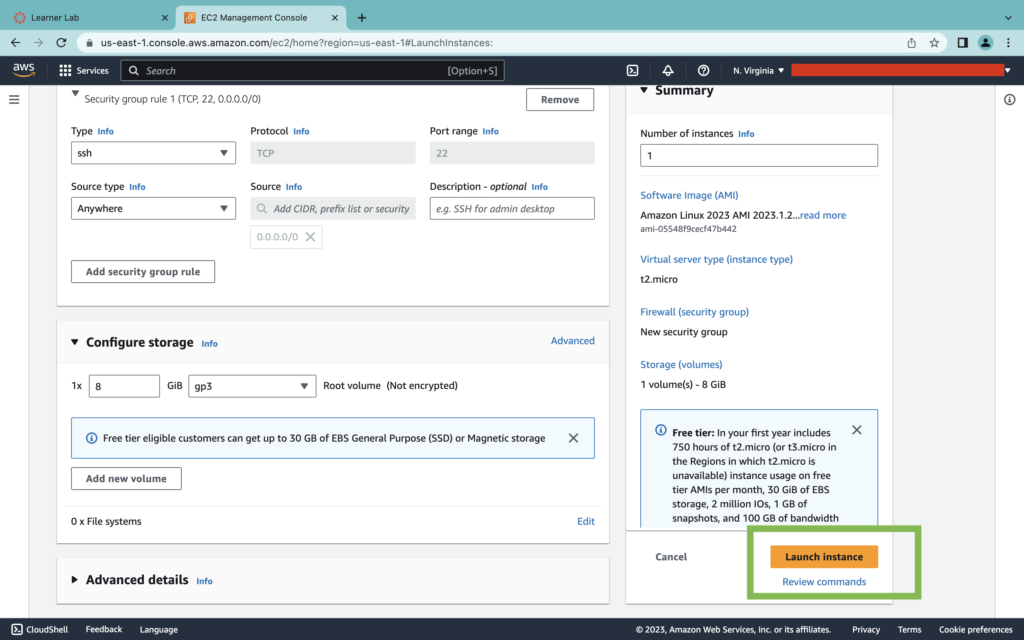
And last click on the Launch Instance button
And we are ready to connect.

Connect AWS EC2 Instances In AWS Student Account
There are many ways using that we can connect our AWS EC2 instances, there are also some tools like PuTTY using which we can connect. They are called clients to connect the servers.
Here we are going to connect from the inbuilt browser-based client and from our terminal window using SSH client.
Connect EC2 from Browser-Based Client

Just simply click connect. and we got the terminal of our AWS EC2 instance.

Connect AWS EC2 Using SSH Client From Terminal
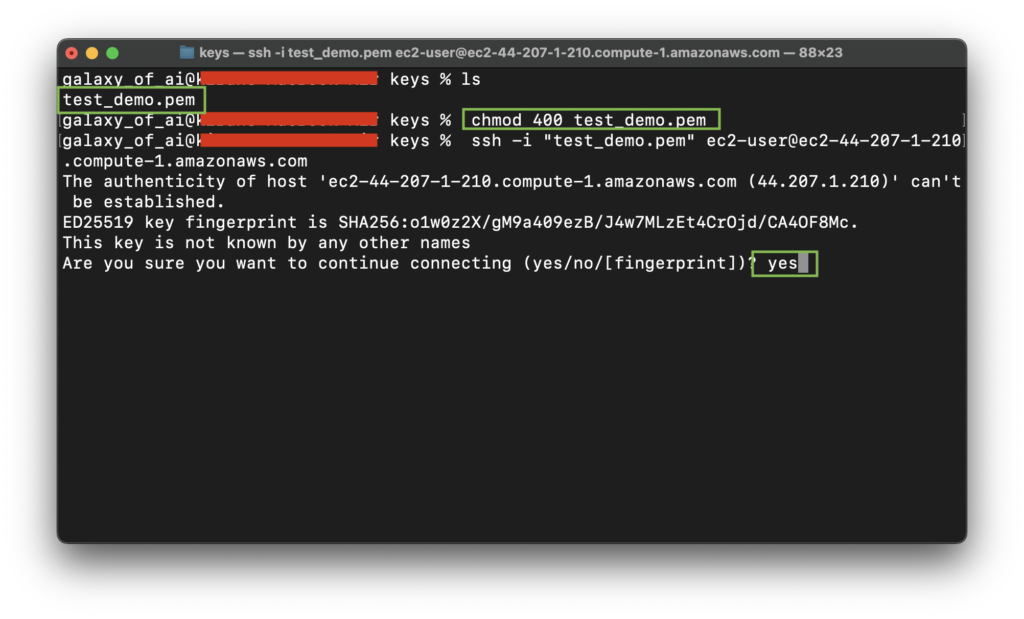
To connect using an SSH client we required a .pem file which is created when we create a Key pair and downloaded in our local system.
Go to the directory where the .pem file is located.
Run the below command first to change the file permissions.
chmod 400 test_demo.pem #use your file nameAfter that run the below command
ssh -i "test_demo.pem" ec2-user@ec2-44-207-1-210.compute-1.amazonaws.com
It’s prompt for the confirmation to type yes and hit enter.
And it is successfully connected. and got the terminal of our AWS EC2 instances.

So this is it, We hope that you get connected with your EC2 instances. You can comment if you are getting any kind of error or need help.
Summary
This is the simple way to connect our AWS EC2 instance and after that, we can use it for further deployment of our projects. we will see this in our upcoming posts.
Also, refer to learn more,
Happy Learning And Keep Learning
Thank You…
2 thoughts on “Create And Connect AWS EC2 Instances In AWS Student Account”