Hello Learners…
Welcome to the blog…
Table Of Contents
- Introduction
- Publicly Accessible Flask API Using An AWS EC2 Public IP
- Adding Rules to Security Groups for the AWS EC2 Instance
- Run Python Flask API On AWS EC2 Instance
- Summary
- References
Introduction
In this post, we discuss how we can make Flask API Publicly Accessible Using an AWS EC2 Public IP address. Publicly Accessible Flask API Using An AWS EC2 Public IP helps us to showcase our work or projects to others through the Internet.
In today’s interconnected world, deploying web applications and APIs that are accessible to users worldwide is a common requirement.
Simply creating a Flask API isn’t enough; we must ensure that it is publicly accessible to users over the internet.
Please follow these tutorials for how to create and connect an AWS EC2 instance using a terminal or in your vs code.
- To create and connect aws ec2 instance using terminal
- To Connect aws ec2 instance with vs code:
After that, we can follow the steps for making our flask API publicly accessible using an AWS EC2 instance public IP address.
NOTE: This is not a full deployment process of Flask API, It is just part of it.
Publicly Accessible Flask API Using An AWS EC2 Public IP
To make a Flask API publicly accessible, We have to Follow below steps:
Adding Rules to Security Groups for the AWS EC2 Instance
First, we have to set up inbound rules in the security group of our AWS EC2 instance.
Go to the AWS EC2 Dashboard, and select the Security tab,

In this click on the Security group which is associated with our AWS EC2 instance.

Here in the Security groups select Edit inbound rules,
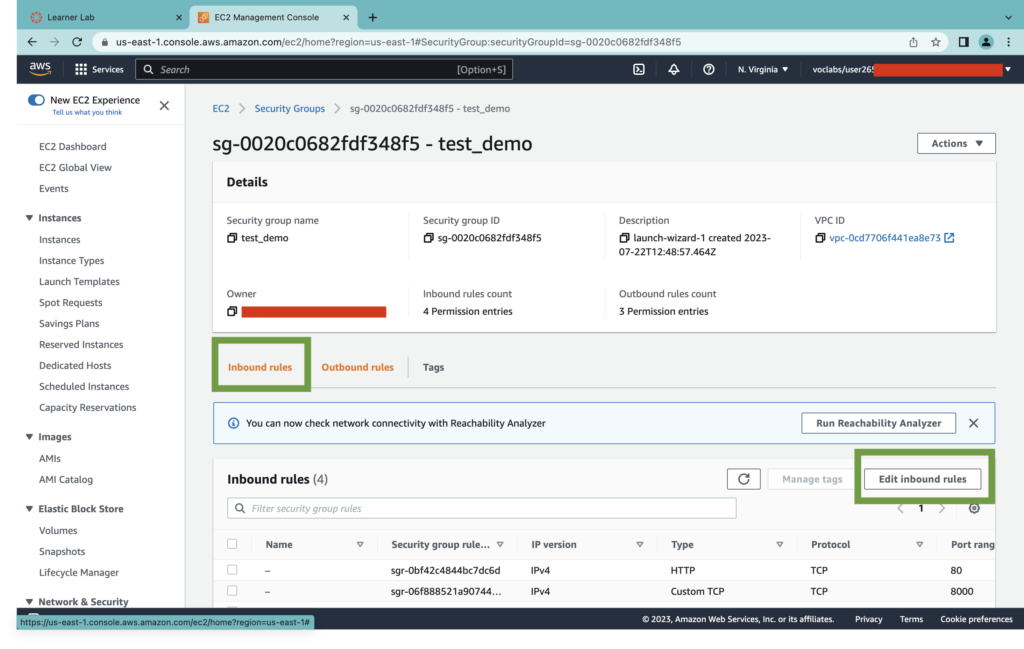
Here, add inbound rules as shown below.
HTTP, SSH, and HTTPS are the most useful ways to connect and communicate with our AWS EC2 instance so if you don’t have added already please add this.
Here we add a Custom TCP with Port number 8000 Because, in the Flask API, we use this port with public IP address, You can use any port which is available.
And Click Save Rules,
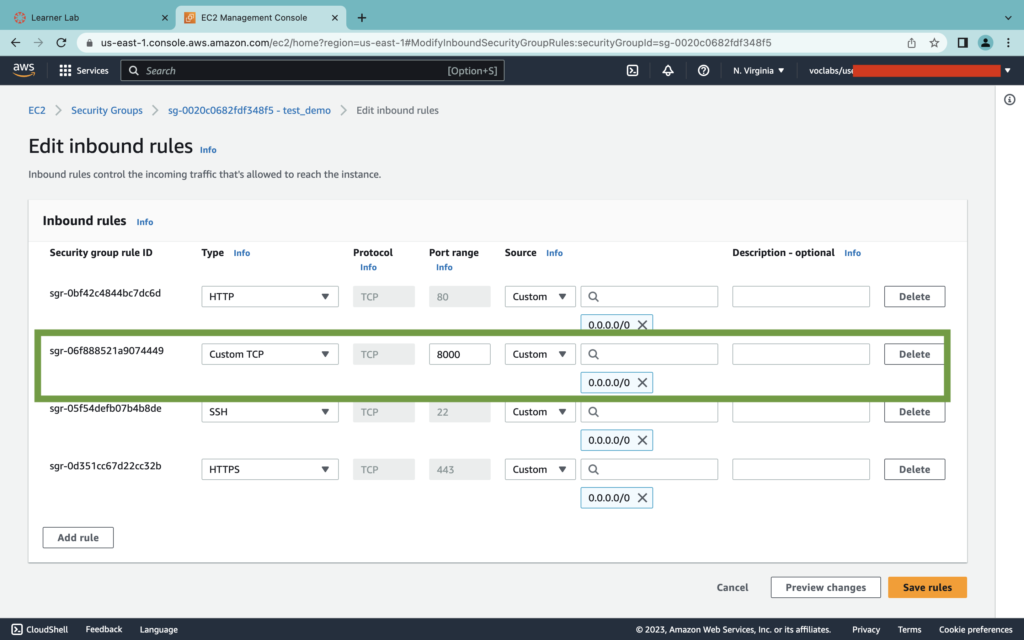
Same as Inbound rules we have to change Outbound rules as below, and click Save rules.
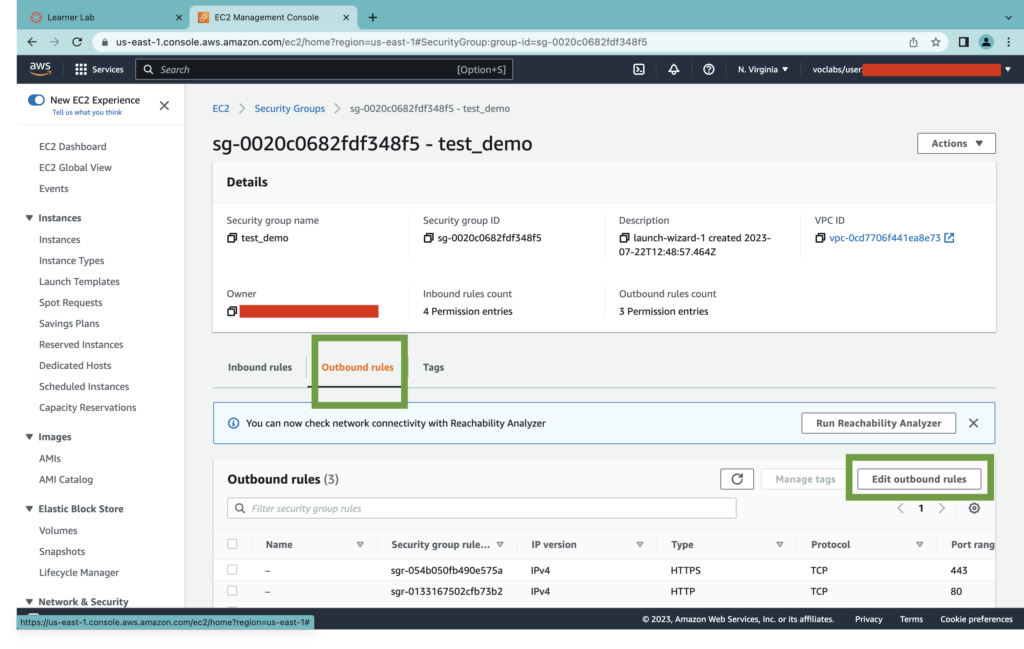
In Outbound we don’t need to add TCP Port 8000.

Run Python Flask API On AWS EC2 Instance
Now, we are ready to go running our Flask API on the AWS EC2 instance and access it from the internet.
To Run the Flask API first we have to create an API on the AWS EC2 instance or we can simply copy files from local to the AWS EC2 instance.
Here we use vs code to connect and create a Flask API on the AWS EC2 instance.
Please refer to the below URL to learn how to connect the AWS EC2 instance with the VSCode.
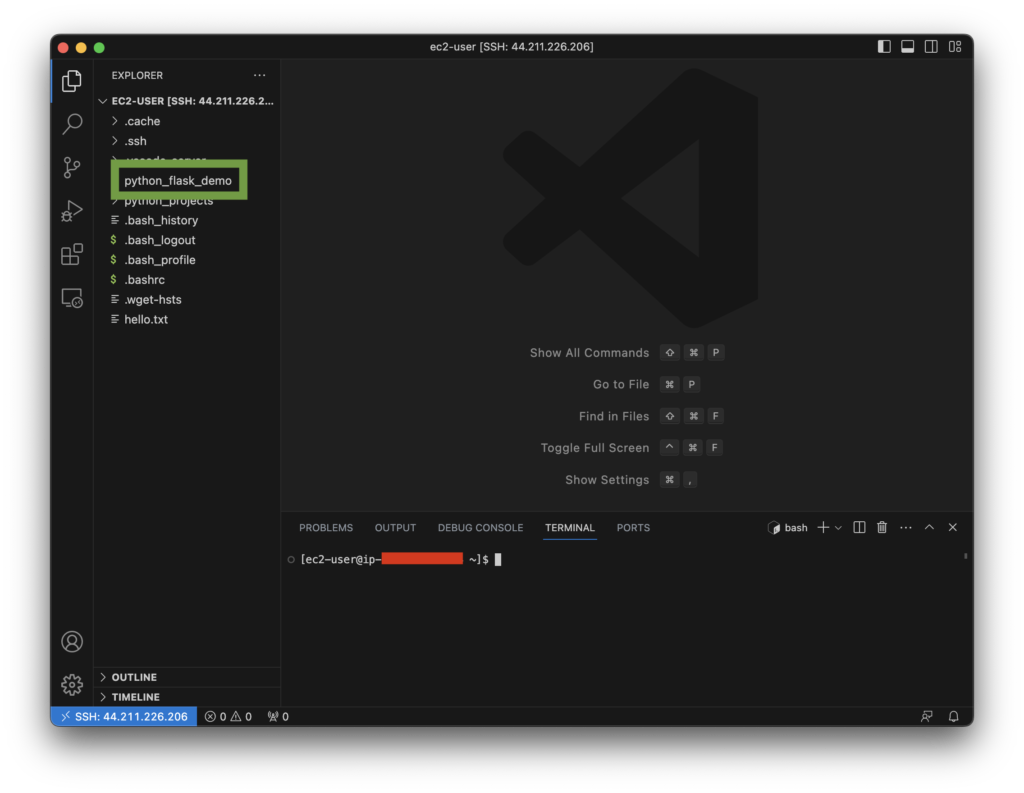
After Connect, We create a folder named python_flask_demo.
Now we create an app.py file in that folder and paste the below code into this file.
This is the simple Flask API.
from flask import Flask
app = Flask(__name__)

@app.route('/')
def hello():
    return 'Hello, World!'

if __name__ == '__main__':
    # app.run()
    app.run(host='0.0.0.0',port=8000)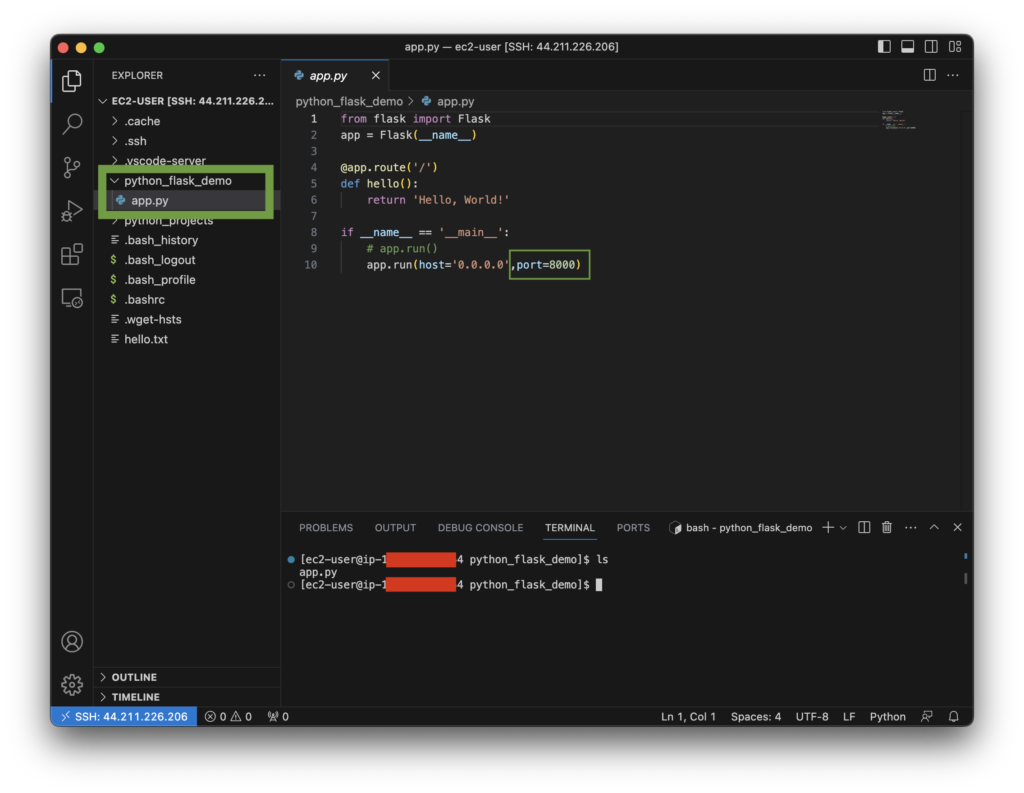
To run the app.py file we create a python virtual environment and install the flask in that environment.
To create Python virtual environment run the command.
python3 -m venv venvActivate virtual environment,
source venv/bin/activateInstall The Flask library using the pip
pip install flask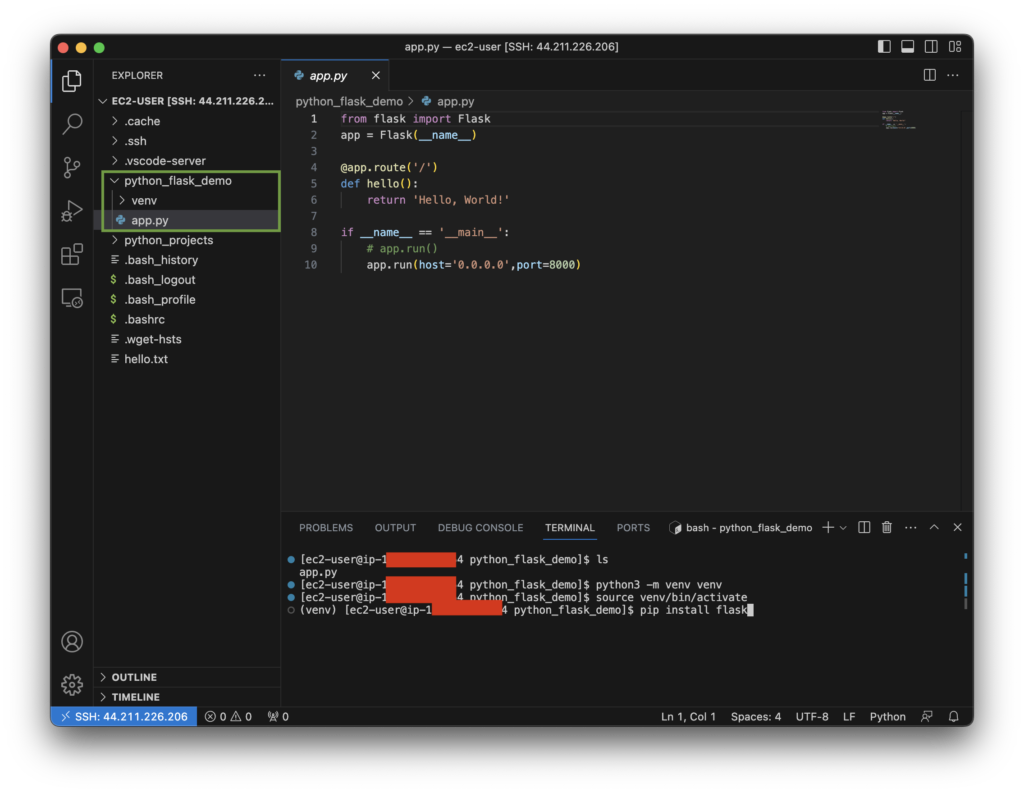
Now we can run the app.py file, run the below command,
python3 app.pyAnd If it is run successfully then we get as shown below image,
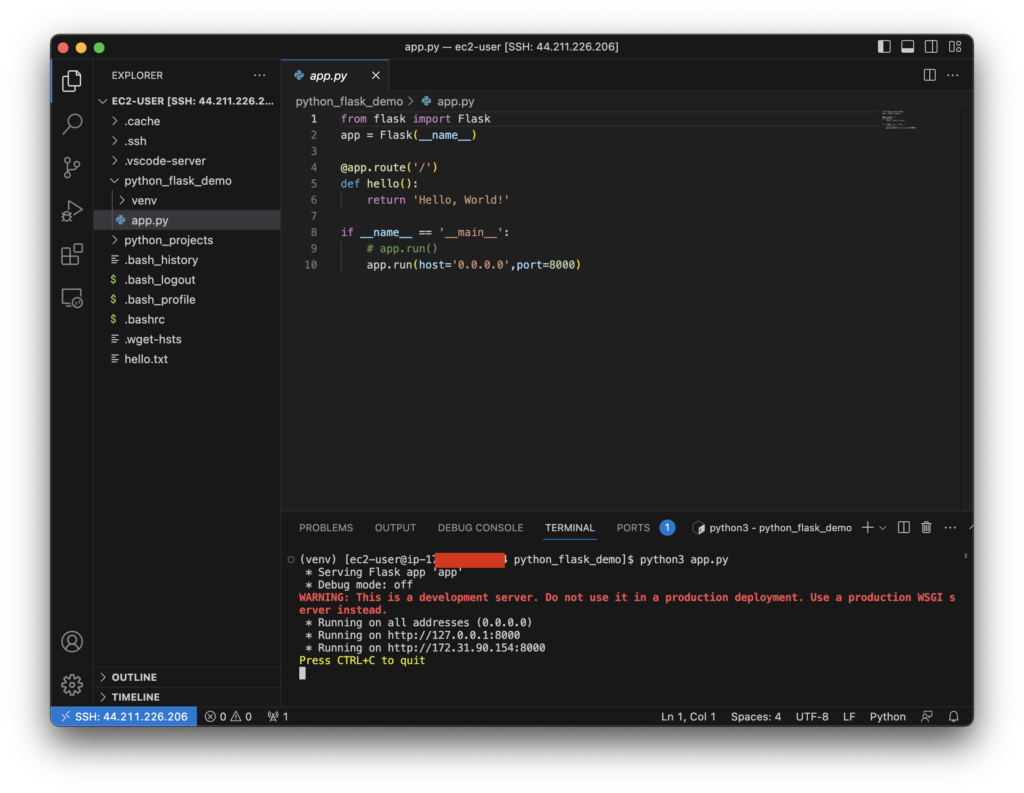
Now we can access this Flask API using AWS EC2 public IP address.
Open the Browser and enter the below URL,
In Our case, the URL is: http://44.211.226.206:8000/

So this is the simple way using which we can create and make it publicly accessible to everyone on the internet.
We can use it the give a demo of our work or our projects to anyone on the Internet.
NOTE: This is not a full deployment process of Flask API, It is just part of it.
Summary
With the knowledge and steps outlined in this post, we have successfully made our Flask API publicly accessible using an AWS EC2 instance public IP.
To learn more about AWS Cloud,
